I bought this little mid-century side table at Goodwill for $12.99 a while back. It's solid wood and just had a few scratches and dings - perfect for what we needed for the end of our split apart sectional (can you see the open edge in the picture above? Our little living room is too small for our large sectional and it was driving me crazy).
I decided to sand and stain (instead of paint) the table a color close to the original because I liked its rich brown goodness. Plus, we already have a yellow side table so I didn't want too many colors going on.
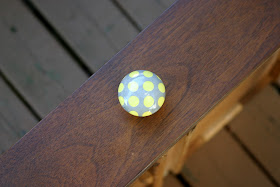
First things first, I had to put a handle on it so we could use the little drawer (turns out we never actually use that drawer anyways). I remembered that I had bought at Michael's a while back some cute little knobs for $1 each in their dollar section (seriously, sometimes you can get the best stuff on the cheap in the dollar section).
The only problem was the hole in the drawer wasn't quite big enough. Cue the power drill.
Pretty simple... I got a drill bit that matched the size of the knob and drilled away.
Step one... check! Step two - sanding. To start, I borrowed my parents belt sander, as well as their oscillating tool, and sanded that puppy down (after removing the knob, of course). I hate sanding. H.A.T.E. The tools make it easier, but it's still not my favorite thing. I
Step three - on to actual staining. This was quite the experience. I really didn't have a clue what I was doing, so I did, what else? Read the instructions on the can of stain. I ended up getting Minwax two in one - stain and top coat (less work for me hopefully) in Mission Oak. Put it on with a cheap paintbrush and tried to apply the coats as evenly as possible.
After two coats, some touch ups, and a couple days of drying outside, we were back in business. It turned out pretty well except I am not the greatest at sanding. You can see some of the spots where I got tired and went opposite the grain and a little too deep. Oh well. That part will probably be covered most of the time, so I'm not worried.
And here's the finished product. I like it a lot. Still has the same rich color, just a little more gussied up.


No comments:
Post a Comment