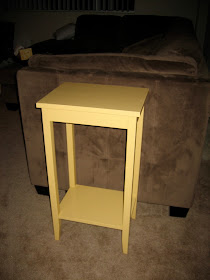
Let me preface this by saying I'm definitely not a DIY expert and I'm still learning as I go. That's the fun part, right? A few months ago, I decided to do a little DIY project. We had just moved in and needed an end table next to our couch. I was not about to pay upwards of $100 just for a small end table. So I scooted on over to Goodwill and found this little beauty for a mere $19.99.
It was in great condition and only a little wobbly, which was easily fixed by a little twist of a screwdriver. I also picked up a hand sander (note to self: get an electric sander one day!) and a quart of Behr Premium Plus Ultra Paint and Primer in One in Martha Stewart's "Egg Yolk." Then began the fun part. I'm not sure if I actually needed to sand it down, but the finish looked shiny enough where I figured it wouldn't hurt. Like I said before, I'm definitely investing in a electric sander someday because it took me a couple hours (at least!) to get it sanded down enough to start painting. I was so sore the next day!
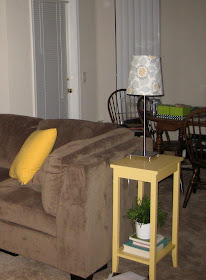
I think I had to apply about 3 coats of paint to get it fully covered. Keep in mind, I'm pretty impatient, so I don't think I let it completely dry before I did the next coat (I would not advise this!). In the future I will leave plenty of time in between coats. Another thing I'm going to put in the ol' vault for next time is to use some sort of top coat to seal and protect it. Any suggestions of the best/cheapest/easiest top coat to use? I still might apply a top coat at a later date, but for now my little table is doing quite well. It looks great with our couch and adds the pop of color I was looking for.


No comments:
Post a Comment