Photobucket Photobucket Photobucket Photobucket

Friday, August 17, 2012

Happy Weekend!


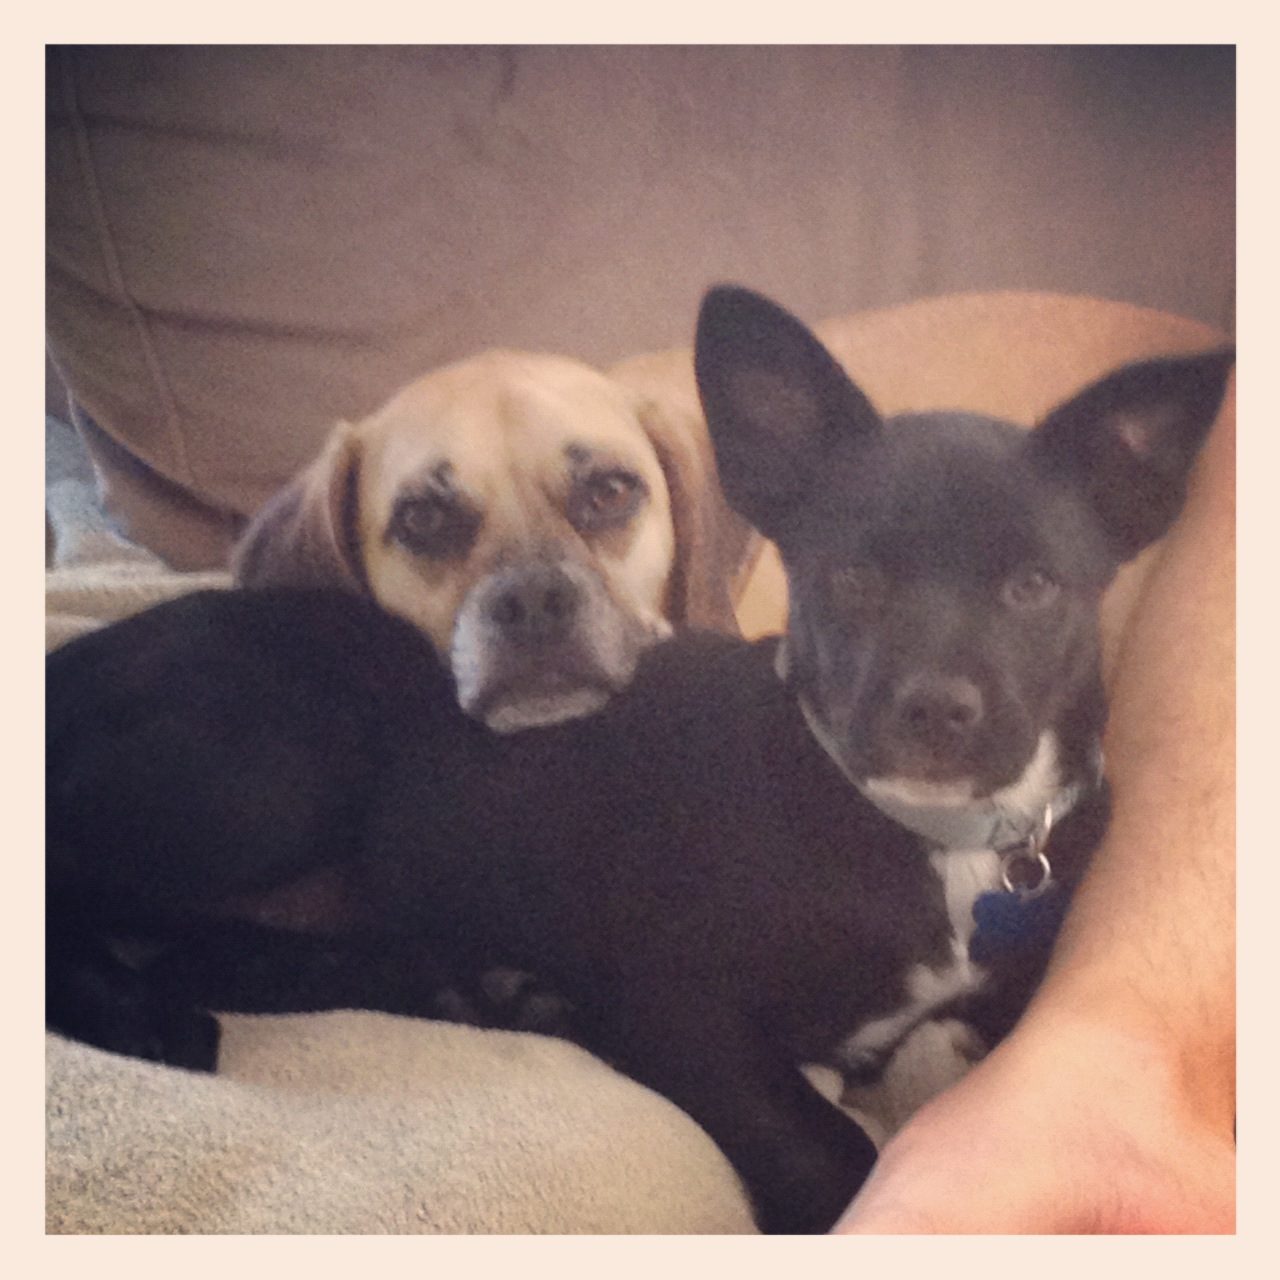
Happy Friday! I wish I could plant a big one on the husband right now, but alas, he's still in Pendleton for another week learning a bunch of doctor things. This weekend I'm living the bachelor bachelorette life. Well, just me and the pups (Brody's already getting so big!). 

Saturday I'm super super excited (like Christmas morning excited) to head over to Georgetown to the Pacific Galleries Flea Market with Kim! 30,000 square feet of antique and vintage goodness! I will definitely be sharing our finds with you next week! I can't wait! Enough exclamation points for you?! :)

What are you up to this weekend? How are you planning on beating the heat (and/or thunderstorms)? 

Have a great weekend!

Photo via (if you know the original source, please let me know!) 

Wednesday, August 15, 2012

DIY: Updating a Goodwill Tray

For a while now, I've wanted a cute and colorful tray. You know, one you put on a table or desk or something to style with pretty things. We had a leather tray once. It got the job done, but it wasn't very pretty. I saw this red Moroccan tray at Target a couple months back, but couldn't justify the $25 price tag. I was seriously close to buying it though! 

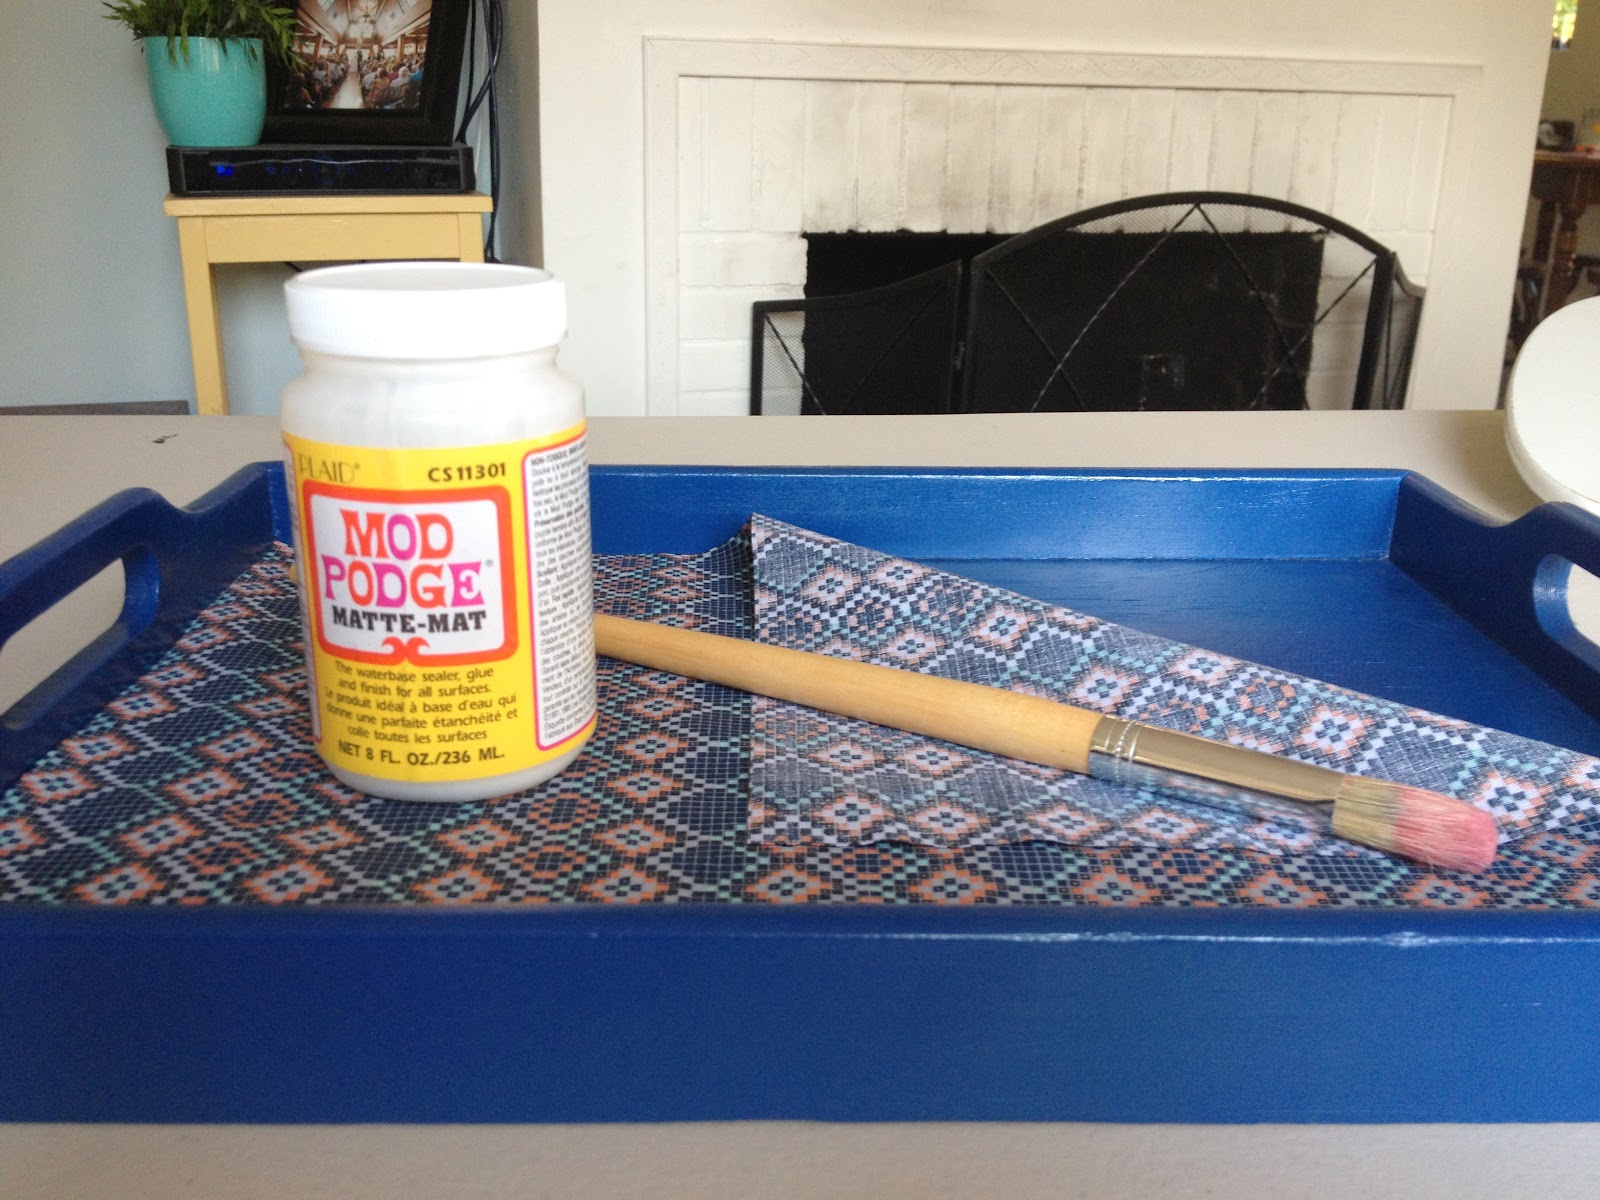
I'm proud of myself for refraining ((pats herself on the back)) and I'm so glad I did since I found this little gem for $2 at Goodwill. Throw in about $2 worth of fabric, some spray paint, and some Mod Podge I had on hand, and I have a totally new tray for under $10!

The wooden tray started out with a lovely cabin scene. I thought for a quick minute about keeping the cabin scene and just painting over it, but the design got lost after a little spray paint. 

Here's how it looked after a few coats of spray paint (Valspar Gloss in Marine Blue). This pic makes it look more electric blue, but it really is more of a true navy, which is what I was going for. As you can see, the cabin is gone. :(

Back to plan A though! I had purchased lots of fun fabrics for some other projects, including an old navy and white striped sheet from Goodwill (that I washed a lot of times - don't worry!), and had the idea to line the tray with a fun print.

I was very indecisive with my fabric choices. If I was at Mood on Project Runway, I would have gone back to the workroom with nothing (are you watching the new season, by the way? My early favorite is Sonjia!). I settled on two and then had you guys help me on facebook and instagram (@mykane) decide between these two.

The results were very interesting, but the clear winner was #1! Thank you so much for your comments. It helped a lot! I was still pretty torn about them both (because we all know that I love a good stripe), but I decided to go with... drum roll please... #1! In the end, we already have a lot of stripes going on in our living room (where this guy would end up) and I didn't want it to be a stripe overload. Plus, I am really in love with the first print. It's a little bit Southwestern but with a modern color palette (I'm in love with the aqua + navy + coral), which is a nod to our time in Arizona without getting too Southwestern-y. But fear not! I maybe kind of have another project in mind to use the navy + white stripes! Stay tuned!

The next step was to cut the fabric and apply it to the tray. I measured the inside edges of the tray and then cut with my roller.

I applied the fabric to the tray with Mod Podge. It's great to use with fabric on the top and bottom since it dries clear. I painted on one even coat on the bottom of the tray, applied the fabric using a piece of cardboard to smooth it out as I went, and then placed some books on top to help it set. It dries pretty quickly. Then I applied a thin even layer on top of the fabric.


After letting it dry overnight, I was so excited to make it look pretty! Here's how it turned out!


I'm digging the tray. It's perfect for our twenty three remotes, too. I've never really used trays before, but I'm realizing they are a perfect way to create some organized chaos. Confine the mess to the tray! Not that there will be a mess...

Do you have any fun trays in your house? What have you used Mod Podge for lately?

(Target tray source)

Tuesday, August 14, 2012

DIY: Chalkboard Window Frame

I'm really excited to share this project with you! Back around the time I went to Portland with my mom to get fabric for my wing back chair, we stopped by my Grandma and Grandpa's house and picked up a vintage dresser as well as this vintage window frame.


The picture is a lovely southwestern picture that was actually on a piece of wood nailed to the frame. My Grandma wanted the picture but said I could have the frame which I loved! My mom has one just like it in a different color and put a mirror behind the frame. My grandma had previously painted the frame with some crackle paint (remember that?) which I don't really like. For some reason though, with this frame I think it's not so bad paired with the black chalkboard. It's not overwhelmingly crackle-y, and it gives it some texture.

When I went to Centralia to do a little antiquing with my mom a while ago, I got the idea to put chalkboard in the frame to create a board for our kitchen/dining area for lists and notes and such. Since I had recently painted a little planter in chalkboard paint, I loved the idea of also creating my own customized chalkboard frame.


The first step was getting some thin plywood from Michael's that I could paint with my $8 bottle of chalkboard paint. I was glad I was putting that little bottle to good use since it was so expensive! I first measured the frame to see what size I would need. Since each square frame had a little indent to place the original glass, I decided to cut individual sized squares to fit in the frame perfectly rather than using one larger piece of plywood. Luckily, Michael's had thin plywood that came in 12" x 24" pieces. The size I needed for each of the six panes was 9 3/4 x 10 1/4 so I got three pieces of the 12x24 inch plywood (two panes per plywood).

For Christmas, my mom got me the Dremel multi-tool which has a sanding feature as well as a little saw. Since the plywood was thin enough, I used the Dremel to cut the plywood to size. It wasn't the easiest process since we don't have anywhere to really cut wood (we used the railing of the deck - ha!), but we got it done and luckily the pieces didn't have to be perfect on the edges since the frame would cover them.


After all the pieces were cut, I started painting. I think I did about three coats of the chalkboard paint to get a nice even surface. The chalkboard spray paint might have been an easier option, but the regular paint worked fine.

One thing I would have done differently is sand the boards first. I didn't sand at all before I started painting since the plywood seemed pretty smooth. It works just fine for the chalkboard, but could be smoother and sanding would have definitely helped.

When it came time to attach the chalkboard panes to the frame, I was having a little trouble. I was going back and forth on what I should use, but settled on glue since it seemed like the most sturdy option. I got some original Gorilla Glue from Lowe's and with the frame turned on its face, glued around the edge of each pane then laid the chalkboard panes face down on top.


Then came the hard part... waiting (I can be so impatient at times!). I piled on a ton of books to apply pressure to the panels and let it sit for a good hour (the gorilla glue claims it only takes a half hour to dry).


The bad part about the Gorilla Glue is that it kind of foams up and it's white. When I turned it over, all the panels were rock solid, but on the front you could see the glue around the edges. Not cool.


So out came the exact-o knife to scrape off all the excess, which took a while. It also left a little film on the chalkboard which I didn't like. I ended up doing one more coat of chalkboard paint to get nice even lines along the edges.

I attached some hardware for hanging and it was done!


I am so thrilled with how it turned out! It's a twist on the standard chalkboard frame and I love it!!! I also had fun creating this little vignette!


It also looked great with our new yellow clock on the wall!

I got the two other frames on the wall at Goodwill, as well as the little brass box (for about $5). The cookie jar I painted at The Dancing Brush pottery painting studio in Poulsbo a few years ago (unfortunately it is empty right now). I recently spray painted the yellow wooden box to give it a pop of color against the IKEA faux plants (same color as our wall clock). I added paint chips in my colors to the golden frame for a super quick way to add some color to the wall and tie everything together.

Here's the total cost breakdown:
Frame - Free!
Plywood - $12 ($4 each for three)
Paint - had on hand (but it was $8 for the bottle)
Chalk - had on hand (about $1)
Glue - $7 (but I can use it for other things too)
Total Cost - $15 (approximately)

I'd say that's pretty good for a custom chalkboard frame! Some of the regular chalkboard frames I saw at the antique and vintage stores in Centralia were selling for $35-40! I love mine and Zach even loves it too saying he is going to use it all the time (he's sometimes a little forgetful:).

Have you jumped on the chalkboard bandwagon too? I refrained for so long, but it's just so much fun!

Monday, August 13, 2012

Regina Spektor

Happy Monday! I had such a great weekend with my husband home! We didn't do anything too exciting (we saw The Campaign. It was OK... and watched the Seahawks! Yay football!). We just got back to our normal selves, which was awesome. The pups loved seeing their daddy too. But now he's back in Pendleton for the next week and a half to two weeks. :( So... anyone want to get together?! :)

Last Thursday night I went with my friend Kim and my sister (in-law) Jenn to see Regina Spektor in concert at the Paramount. It was the third time I have seen Regina, and the third time I have seen Regina with Kim. Our love of Regina stems from college when we first heard her song Fidelity. We immediately loved the music video and the catchy tune and every time we see her it brings us back!


The first time we saw Regina it was in Seattle at the Moore. She was so shy and cute. She even forgot the lyrics to one of her songs and the audience had to help her remember! It was actually pretty funny!

The second time we made a trip out of it and went to Portland. We stayed at this fun boutique hotel in the Pearl District and did some shopping and ate lots of good food. We realized that the opening act for her in Portland was Fun.! You know, of the We Are Young fame. Before they were kind of a big deal!

She's just so good. I would see her a hundred more times because she is so talented. Her opening act this time was this guy from the group Only Son, but it was just him on stage with his guitar and his ipod. We found out (after some hard core google stalking in between the opening act and Regina) that he and Regina are married! Pretty cool!

If you haven't listened to her, I would highly recommend it if you like indie/pop/raw talent kind of music! 

Thursday, August 9, 2012

Hugs + Kisses From the Mrs.

I've been a little MIA this week. It's been a busy week so far (which is good) but I am exhausted already (the late night Olympics are killing me!). I've also been in kind of a funk, especially yesterday. Here's hoping I can snap out of it soon. 

Mostly, I've just been missing this guy.
The main reason is that sometimes medical school sucks. It's hard not only on Zach studying/working/learning constantly, but also on the wifeys! As you know, Z is in his third year of medical school (over half way there!). For year three and four, the students do month-long rotations throughout the year. His first rotation was in Issaquah, so that was great - pretty close to home (most of his rotations will be around the Seattle area). For the past two weeks, Zach's been in Pendleton, Oregon working at the hospital there. The students are basically unpaid interns that get to meet patients on their own and then report back to the attending and discuss what should happen next. He's learning a ton and getting to see so many different things (his first two rotations so far have been in internal medicine, next is general surgery!). 

So, for the past two weeks, I've been a single mama to our furry little boys, and I've finally hit the wall. I do not like this being apart thing. It's been 10 days since I've seen him (although Z would say it has only been 8;) and I'm not liking it at all. I need to see my husband! I miss him so much it's kind of ridiculous.

We did the long distance thing in college (for three years!) and it worked out great. But now, we've been married 4 years and it's totally different. And I don't like it. I want my best friend next to me every night (I may or may not be sleeping with a piece of his clothing because it smells like him). I want my partner in crime back to so we can watch the olympics together and cheer/make jokes together throughout the whole thing.

I definitely have even more respect for single moms out there too (and I only have two dogs - imagine two kids!). It's hard being the only one there and having so much responsibility on you and you alone. 

Anyways, I think you get my point (and sorry if that was a tad whiny...) He comes home TOMORROW! WOOT! I'm so excited! I can't wait, and I think that's why this week has been harder than the first. It's so close, yet time is moving so slowly. The first week went by pretty fast since I kept busy with lots of projects (I'll be sharing some next week hopefully!). But this week is dragging...

So I think you all know that I love to bake (and the husband loves to eat whatever I bake). Last week I pumped out some oatmeal chocolate chip cookies (my favorite!) and decided to send my mister a little care package to help him remember his awesome wifey. :) I had seen this idea at weddings before and loved it! So simple and cute. I made a little card to go in there too. 

I bought a bag of Hershey's Kisses, a bag of Hershey's Hugs and a bag of Snickers (because those are his favorites). I was going to put some fishies in there too, but ran out of room after I added the cookies. 
I miss you so much Zachary Michael! Can't wait for you to come home to me! 

P.S. Happy 32nd Anniversary to my amazing parents! We are so lucky to have such great role models! Love you guys!

Friday, August 3, 2012

Buster + Brody

How is the new pup doing, you ask? He's doing really well! He's such a little sweetie. We should have named him Shadow because he is always at my heels or laying on the floor below me. He's definitely a lover, which is so different from how Buster was. Buster has always been really independent and curious, nose to the ground exploring everything he could. Brody just wants to be around us all the time. Even if I use the restroom, he wakes up from his sleep and follows me in there. 

We are getting there with the house training, and already we can tell he is smart. He knows how to sit and we weren't even really "training" him yet. Much easier than Buster was so far! Although, Buster seems so much better right now since we are comparing him to Brody who knows nothing. 

What else? He's about 13 lbs now - or he was a week ago when we went to the vet. We are going again tomorrow for his next round of shots and I'm sure he will have gained a couple more pounds since he literally inhales his food.

This is my favorite pic of the little guy. I call it his glamour shot.


How are the pups getting along together, you ask? It was fairly easy when we first introduced them. Brody is so nice and friendly he just went right up to Buster (like I said, opposite of Buster who we think was probably abused before we got him and is a little shy). Buster soon tried to express his dominance with humping and barking when they played. We've gotten him to stop the aggressive barking when they play (unless he is really excited) and now Brody is the one that gets all growl-y when they play (still working on that one - hopefully puppy classes will help). 

They love chasing each other. Rather, Brody chases Buster around the yard and around the living room (Buster does his own parkour off the couch). Brody is pretty fast, but Buster takes him on the corners. Yesterday, Brody was chasing Buster in the yard and couldn't quite keep up with him. He started whining, but kept chasing! So cute!

Other than that, they get along great. They even started cuddling a little bit!


How is Buster dealing with everything, you ask? He's doing fine. It was definitely an adjustment for him, but after a couple weeks he's finally getting used to the fact that this little guy isn't going anywhere. He is sporting more Emo looks than usual these days, but I think he is just tired from Brody wearing him out during the day (mission accomplished!).

We love having Brody around, although it is a lot of work training a new puppy. We are planning on getting him into puppy classes asap so he can meet some other puppies and learn proper manners (we don't want all of Buster's bad habits rubbing off on him!)


He's definitely going to be a big boy! Look at that paw. It's been a crazy new adventure for us, but a lot of fun too!

Today the boys and I are heading down to see my parents for the weekend. Brody gets to meet his Gramma Vonnie for the first time (and his Gpa too)!

Have a great weekend!

Wednesday, August 1, 2012

Renton River Days

Happy August! I can't believe we are already this far into summer! It seems like just yesterday we had our first few sun breaks right after the 4th of July...

Saturday we stopped by Renton River Days, which is basically Renton's annual fair without the rides. And it's just down the street from us in downtown Renton! I had heard about the event before, but found out about it this year while on my way home last week - I saw a mini circus set up outside at the Renton Community Center. Turns out it was the Wenatchee Youth Circus performing all weekend!

Zach and I love being tourists in our own city (Exhibit A) so we made our way downtown to take it all in. On the walk to Liberty Park, we were surprised by how peaceful and calm it was to walk along the Cedar River. So pretty!

There were tons of booths with local vendors. My favorite was the booth with the real life angry birds game (although I can't remember who was actually running this booth - a bank maybe?).


I loved these wooden salt + pepper shakers.

I liked the maps in the background of these paintings of local landmarks.

These lanterns would be fun for the backyard.

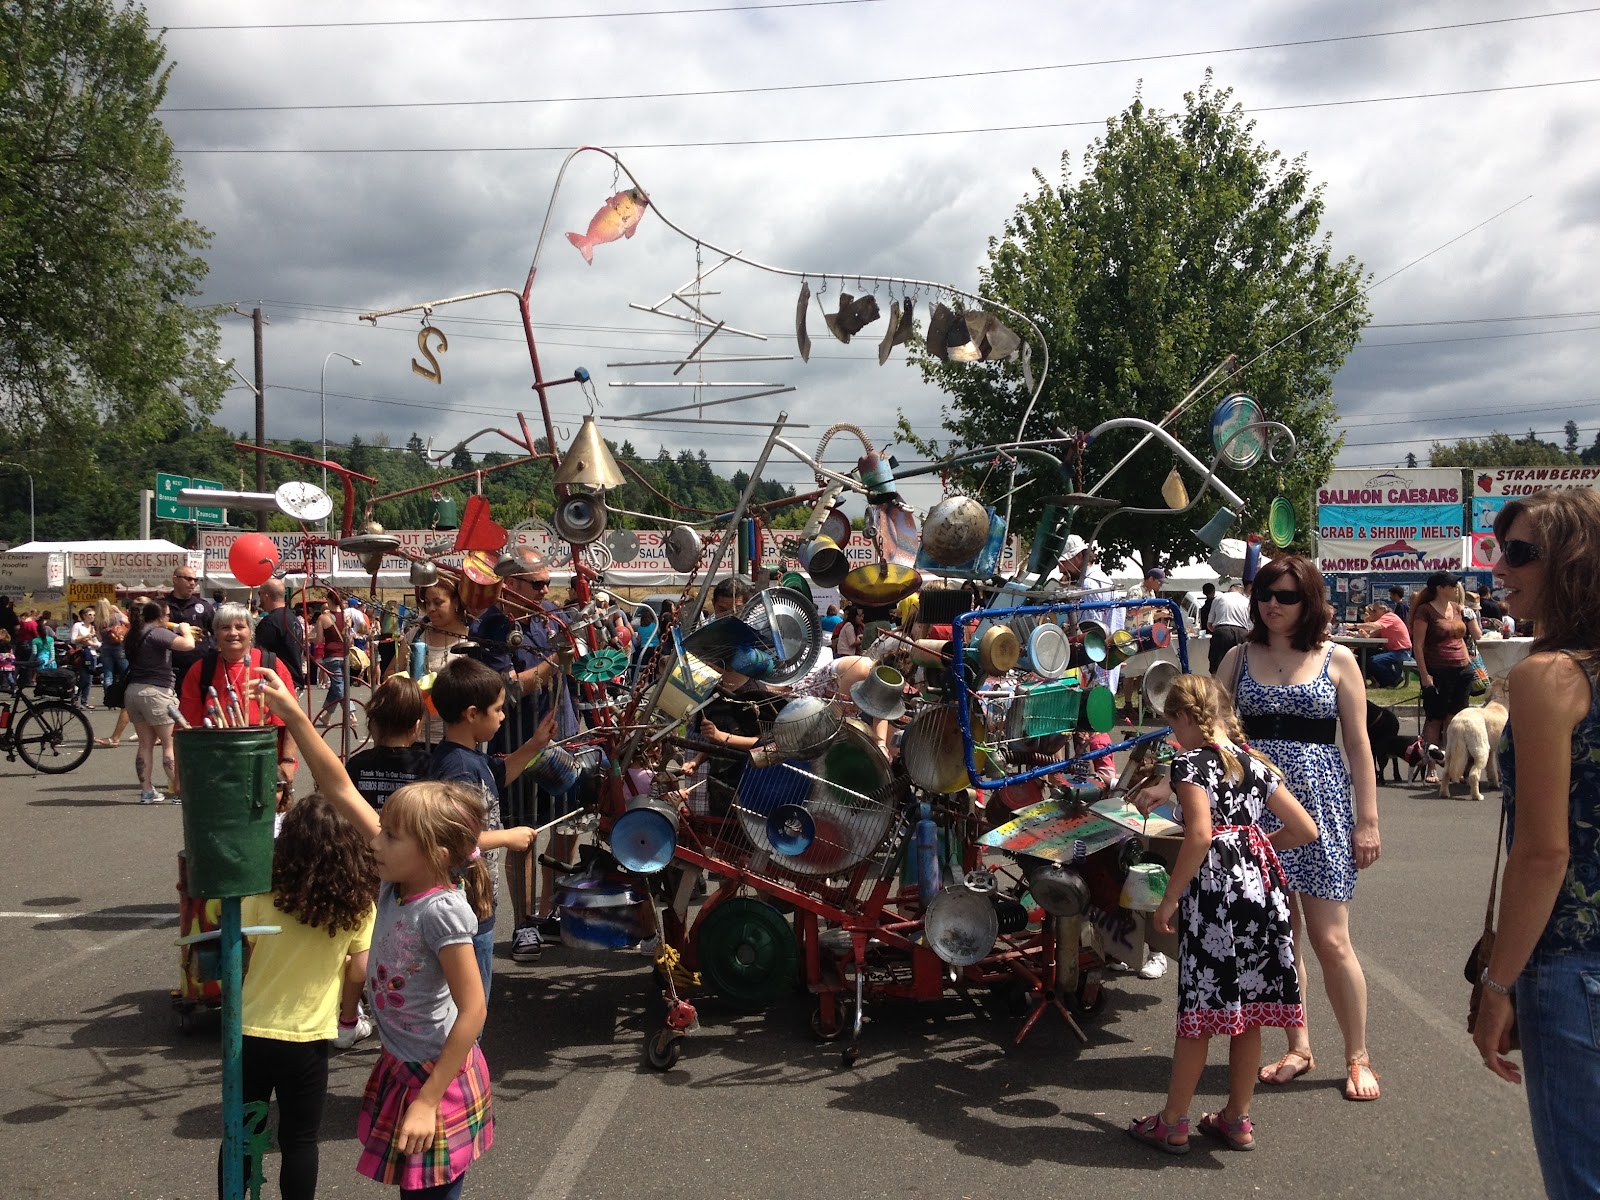
This structure was made out of a ton of pots and pans and metal. They had drum sticks for the kids to pound away and make some sweet music (you can see the little girl taking some in the bottom left of the picture). 


Of course, we had to stop by and grab some grub. We figured we'd be safe by picking the longest line, so we stuck it out for the gyros (Does anyone else have trouble pronouncing that word? Just me?). They weren't bad, but I've had better. In true fair fashion, we ended the day with an elephant ear. It was that or the deep fried Twinkies, but Zach had to go with the old standby.

We had a great time, but I would say the River Days are definitely geared more towards kids. While they didn't have any rides, they had a ton of kid stuff - rock climbing wall, bouncy house, and fire trucks galore. They even had the fire hose going for the kids to run through. So if you have kids, Renton River Days is perfect!

What fun summer events does you have in your hometown?

Also - can we just talk about the time delay for the Olympics? I am trying to stay off facebook (and other social media) to avoid hearing results, but forgot last night and found out the women's gymnastics results before I watched. Booo! I know it's tough with the live versions happening 9 hours ahead, but I still want there to be some suspense! U-S-A! U-S-A!

LinkWithin

Related Posts Plugin for WordPress, Blogger...