Photobucket Photobucket Photobucket Photobucket
Showing posts with label Sewing. Show all posts

Monday, April 28, 2014

Herringbone Quilt for Emerson


It's only been over a year since I worked on this project... sheesh! Last year towards the end of tax season I got the major nesting bug. Like whoa. I hadn't done anything for the nursery yet besides gather my overall inspiration. I really wanted to make a quilt for Emerson and I loved the quilt from my inspiration nursery (see it here). I also wanted to do something really easy - those are my favorite kind of quilts. I like having something creative to do that isn't overly complicated. That I can still work on while I watch my "stories." 

I used this tutorial, which was super easy to follow. I made this crib-sized (or close to it), so about 42" x 52". 


Fabric:
1/4 yard each of the patterned fabrics (I did not use the gray pictured above)
1 yard of white fabric
1/2 yard of solid aqua fabric
1 1/2 yards for orange/coral polka dot fabric (used for back)
(I think overall I spent about $50 on fabric at a local quilting store)


Fabric Cuts: 
15 squares each of the patterned fabrics (ish)
60 squares of white (ish)

The method used for cutting the triangles was so easy it is a major "DOH!" moment once you realize how awesome it is. Instead of cutting and then matching up a zillion triangles, you just keep the squares intact, place them right sides together and pin. Then, from one corner to the other draw a diagonal line with a pencil and ruler. From there you can just sew a 1/4 inch seam on each side of the line. Once you sew on each side, you just cut down the line and now you have two new squares, but made up of two different patterned triangles! Genius! 


As far as layout goes, I used the "organized chaos" method. No official pattern, I just started laying down the triangle/squares making sure that no two patterns were right next to each other and were somewhat evenly spaced.

Helpful hint for keeping the layout preserved while you are sewing... we (and by we, I mean my Mom and Me - she is the quilting queen!) set out the squares on top of the backing, then rolled up the backing with the squares (another genius idea from mi madre!). It keeps everything compact and in order so you don't have to keep it set out on the floor while you sew. Also very helpful if you need to move it, but don't want to take apart your layout! 

I sewed the squares together horizontally first and then sewed the long rows together vertically, if that makes sense. Then came the ironing. Lots and lots of ironing...


My mom had the top and bottom quilted together by another lady that specializes in quilting. I had her keep it simple and quilt "in the ditch." My mom did the aqua binding to finish it off!


I absolutely love how it turned out and it works so well in Em's nursery! I hope Em loves it for years to come!

Tuesday, November 19, 2013

Quick and Easy Cross Baby Quilt


I recently got bitten by the bug. The quilting bug. I actually made a quilt back in April for Emerson (I'll post that one later) that was so easy and fun to make that I wanted to make another one for a friend for her baby shower (more on that one later too). But today I'll share another baby quilt that I just made for Em. 

I have wanted to make a Cross/Plus Quilt for a while (a la this or this and this) and since I'm addicted to these super easy baby quilts, thought I'd give it a try. I found some cute patterned flannel of jungle animals in aqua, coral, orange and brown and decided to get some solid flannel to use for the crosses. 

I didn't really use a pattern (I'm not too into patterns - I like the quick and easy!) but just cut out 3.5 x 3.5 squares and laid them out in the pattern I wanted, alternating colors so no crosses of the same color were next to each other. Then I just sewed together each row of squares across using a 1/4 inch seam, then sewed together all the rows using the same. Easy peasy. Next I did the "quilting" myself. I put it in quotes because I use that term loosely. I basically just top stitched around each cross to keep all the layers in place. It definitely isn't perfect, but it gets the job done!

I used the patterned fabric for the back which is the binding as well (using this easy tutorial). I was intimidated about the binding at first, but using the tutorial was surprisingly easy.


I love how it turned out - perfect for tummy time and super warm and snugly. Em likes it too!


Wednesday, August 14, 2013

DIY: Ruffled Crib Skirt


Well, this is the second time I am writing this post... stupid computer! Another DIY nursery project for you today. When my mom was over a couple weeks ago, she helped me with this ruffled crib skirt. We used this tutorial and it was pretty helpful.  At first I wasn't sure if I wanted to do a straight crib skirt or a ruffled one (I'm not a ruffles person), but decided to go for the ruffles to make the room a little more feminine and add some texture. 

This project only cost $10 too - it was the IKEA Vivan curtains to the rescue again! It's such a cheap way to get some plain white fabric. The fabric is thin, but worked for the crib skirts since we were doing the ruffles anyways.

We started out with our cuts:
Base - 1 piece 28" x 52" (size of the crib mattress)
Side Panels - 1 piece 52" long, 2 pieces 28" long (and long enough to have the ruffled pieces hemmed on)
Ruffled Strips - 9 pieces that are 2.5 times the width of the sides and six inches high. Three strips for the long side that measured 130" and six strips for the short sides (three each) that measured 70" long.

After making all the cuts and hemming the edges, it was time to ruffle. This was the hard part... and we realized too late that my sewing machine had an actual "ruffling" attachment. Bummer. Instead, my mom used the technique of making three basting stitches in a row along the top of each strip leaving the end threads really long. 

After separating the top three threads from the bottom three, you can pull on the top three and scrunch the fabric together to create the ruffles (making sure to pull hard, but gently so you don't break the thread). It works like a charm, but takes some time to make the ruffles even. 

Then we pieced the ruffles onto the side panels starting with the bottom ruffle and making sure all ruffles lined up. We kind of just made it work... nothing too scientific here.


It was a labor of love, but we got it done! I like how the white ruffles are not too loud but bring some texture and girliness to the room. So glad it's done! And if I never see a ruffle again, I'll be very very happy. 


I'm pretty much done with the nursery and I'm hoping to share pics with you guys by the end of this week or early next week! 

PS - we are in SINGLE DIGITS! Only 9 more days until she is here (hopefully!)

Thursday, June 21, 2012

So... I Made Another Pillow

Apparently I have a thing for pillows and frames. So I made another pillow. Maybe I need to make pillows like Snooki needs to go tanning. I don't know. I found an extra pillow form in our junk room office and thought I should make a quilted pillow. When my mom came over to help me with this project a couple weeks ago I asked her to bring her Accuquilt fabric cutter so I could, yes, cut some fabric. It's the coolest machine. Very simple but gets the job done.

I didn't actually use fabric. Instead, I used two flat sheets from Wal-Mart for $5 each (actually, I had to buy the navy twin sheet set for $9.99 because they were all out of the plain flat sheets). A lot more yardage for your money, although the fabric was not great quality. Since this was my first real "quilting" project in a while, I didn't mind using fabric that wasn't great. I considered it almost a practice run for other future projects. :)

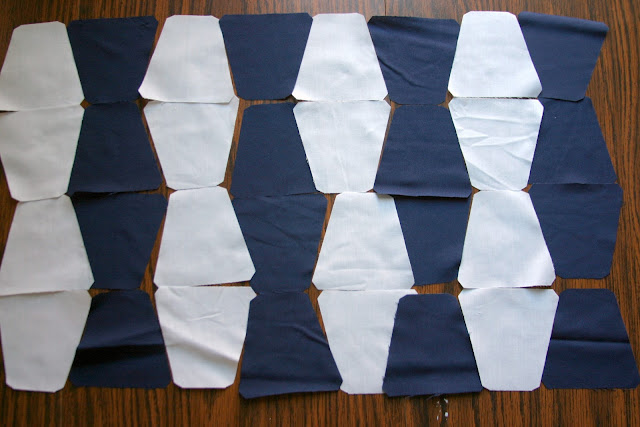
The Accuquilt is pretty sweet. You can put up to six layers of fabric on the dye-cut to roll through the machine. I wanted to try out the tumbler pattern to make a sort-of honey comb pattern, but they also have tons of other dye-cuts in all different shapes and sizes that you can buy as well. Here's how it works...

It's so easy! After I got enough navy and white tumblers I started sewing them together like so.


Once each strip was finished, I sewed all the strips together. All together it was eight across and seven wide. It was a little tricky to get the colors to line up exactly, but luckily it didn't end up too wonky.

For the other side of the pillow, I decided to do classic nautical stripes. I cut strips of fabric about 1 1/2 inches wide and sewed them together. I don't have any pictures of this process, but it's pretty self explanatory.

I ironed all of the seams flat before I turned it inside out leaving a good sized open seam to stuff the pillow in. Then I stitched it up by hand after the pillow was inside.

I like the tumbler side of it, but I really like the stripes. I think I must have a thing for stripes too. I mean, I already have two green striped pillows! Who needs any more? I do. That's who.


And it even looks pretty good with my new Wing Back Lady. Have you sewed any pillows lately? Or is it just me? Pillow lady... just add it to the list along with crazy dog lady. :)

Wednesday, October 26, 2011

Pillow Talk

My mom finally gave me her old sewing machine so I got right to work. I've had about 3-4 pillow forms laying around for years just waiting to be covered in some fun bright fabric. Plus, I decided to change out a few existing pillow cases. 

Check out this old beauty.

I love the old case it came in. However, me and my new machine (I call her Regina) were not instant friends. We should have been, but things didn't really work out that way. I spent a good hour trying to figure out why the tension wasn't working. The top stitch was too tight, the bottom too loose. I tried adjusting everything and it just wasn't working out. Finally, I called in the husband and we he ended up basically taking the thing apart to clean out the 20+ years of dust in there. After that, she worked like a charm.

I'm glad I started with some old ugly scrap fabric my mama gave me (thank, mom!) because it definitely took me a while to figure out. But once I did, we were moving. 

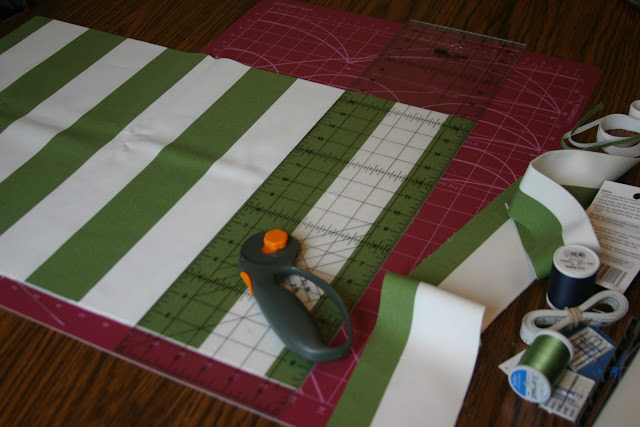
Cut the fabric (I made sure to line up the stripes).


Sew the fabric (sewing was just like riding a bike... it was a little hard to "ride" in a straight line at first though).

Leave an opening to stuff in the pillow.

Iron the edges and trim if needed so they will lay flat. Cut the corners off so they don't get bulky.


And then you have yourself some purty pillows...

...that you now must hand stitch shut. I'm digging the bold green stripes and the navy floral pattern (I even have another project coming up with the same navy pattern too!). 

I love that pillows are so easy to change (especially if you make true slip covers instead of actually sewn in covers like I did) and can really brighten up and bring color to a room. 

Have you sewn any pillow covers lately? How about any other sewing projects that are an easy fix to add a little character to a room?

LinkWithin

Related Posts Plugin for WordPress, Blogger...