




Photobucket Photobucket Photobucket Photobucket
Showing posts with label Nursery. Show all posts

Sunday, April 30, 2017

Teddy's Bear Nursery


Hey there! I'm (finally) back with a little reveal of Teddy's Nursery! He's only almost two years old now... so I figured it was about time? :) We had most of the nursery done when he was born, but for the crib. Teddy got a crib upgrade (from the pack n' play) when he was about seven months old (four months in our room in the rock n' play and three months in the nursery in the pack n' play before that!). Poor little dude (HashtagSecondChildProblems. HashtagCheapParents.). We originally thought Emerson would be out of her crib by the time Teddy transitioned to the nursery (she was almost 2.5 years old) but she wasn't really showing any interest in climbing out and slept great in there, so we didn't push her to move to her twin bed (even though it's already in her "big girl" room). 

The theme for Teddy's nursery is more or less BEARS (mixed in with some arrows and adventure)! It just kind of made sense, since we were calling him "Gummy Bear" since the first ultrasound at 8 weeks. Then we picked his name (Theodore) and the bear theme was pretty much decided for us (Teddy Bear!). 

We kept the walls the same color as they were in Emerson's Nursery because 1) I love the color and 2) we were lazy and didn't want to repaint. Being pregnant with your second child, a VERY BUSY toddler, and a husband in residency is NO JOKE and is totally different than being pregnant with your first. Feeling exhausted? First Pregnancy: Take a nap whenever you want. Second Pregnancy: Don't even think about because it ain't happening. Your toddler is ready to PLAY!

We decided to invest in an upholstered rocker/glider instead of our hand-me-down wooden rocker this time around. Even though I am super sentimental and love that wooden rocker (my Dad bought it for my Mom when she was pregnant with me!), it is not the most comfortable chair to spend hours and hours nursing and rocking restless babies. We got this gray rocker/glider from Walmart (find it here) and it was totally worth it. It's super comfortable and glides and rocks very smooth. It's a little deep, but with the pouf, it's fine. Sometimes I put a pillow behind my lower back and it's perfect. The back is high enough to rest your head on those sleepless "he-only-stops-crying-when-i-hold-him" nights. I can say that after over a year, this chair is still going strong! It's survived many a throw-up, spilled milk, you name it. The fabric is micro suede and cleans up so well. We have loved it. 

Fun fact about the little bear pillow on the rocker... I picked this little guy up at Target because he was only $5 and a bear (and I tend to gravitate towards anything that has a bear on it these days). He has turned out to be the best little pillow ever! Not only does Teddy love to play with him, but he's the perfect shape and size to put behind your next for those late night/early morning feedings to make it a little more comfortable. Might be one of my favorite purchases.


You know I love me a good gallery wall! I'll try to source where I got everything... clockwise from the top left.
Oh, let's be adventurers, darling! - Hobby Lobby
Buster and Brody Profiles - stolen from Emerson's room!
Wooden frame (IKEA) and Teddy's 8 week ultrasound picture (where he looks like a Gummy Bear!)
Bears print - beckydown
T - Joann's
Mustache - Joann's cardboard sign (spray painted Navy)
Bear Cub Print - The Animal Print Shop (I've always wanted one of these prints - Thank you Kim!)
Hanging Arrow - Joann's garden sign (spray painted Navy)
Faux Bear Head - White Faux Taxidermy
Arrows Print - Hobby Lobby
Let's Sleep Under the Stars - Katie Daisy
And... that cute little bear in the frame on the bookshelf? That's Teddy Mike at a fresh 10 days old. 😍 (photography by Lorene Photography)


My company moved office across town before we had Teddy and this was one of the bookshelves in the old office they gave away for FREE. Booyah. I took off the back and added some navy and white striped fabric I had lying around, then reattached. I love how it came out!
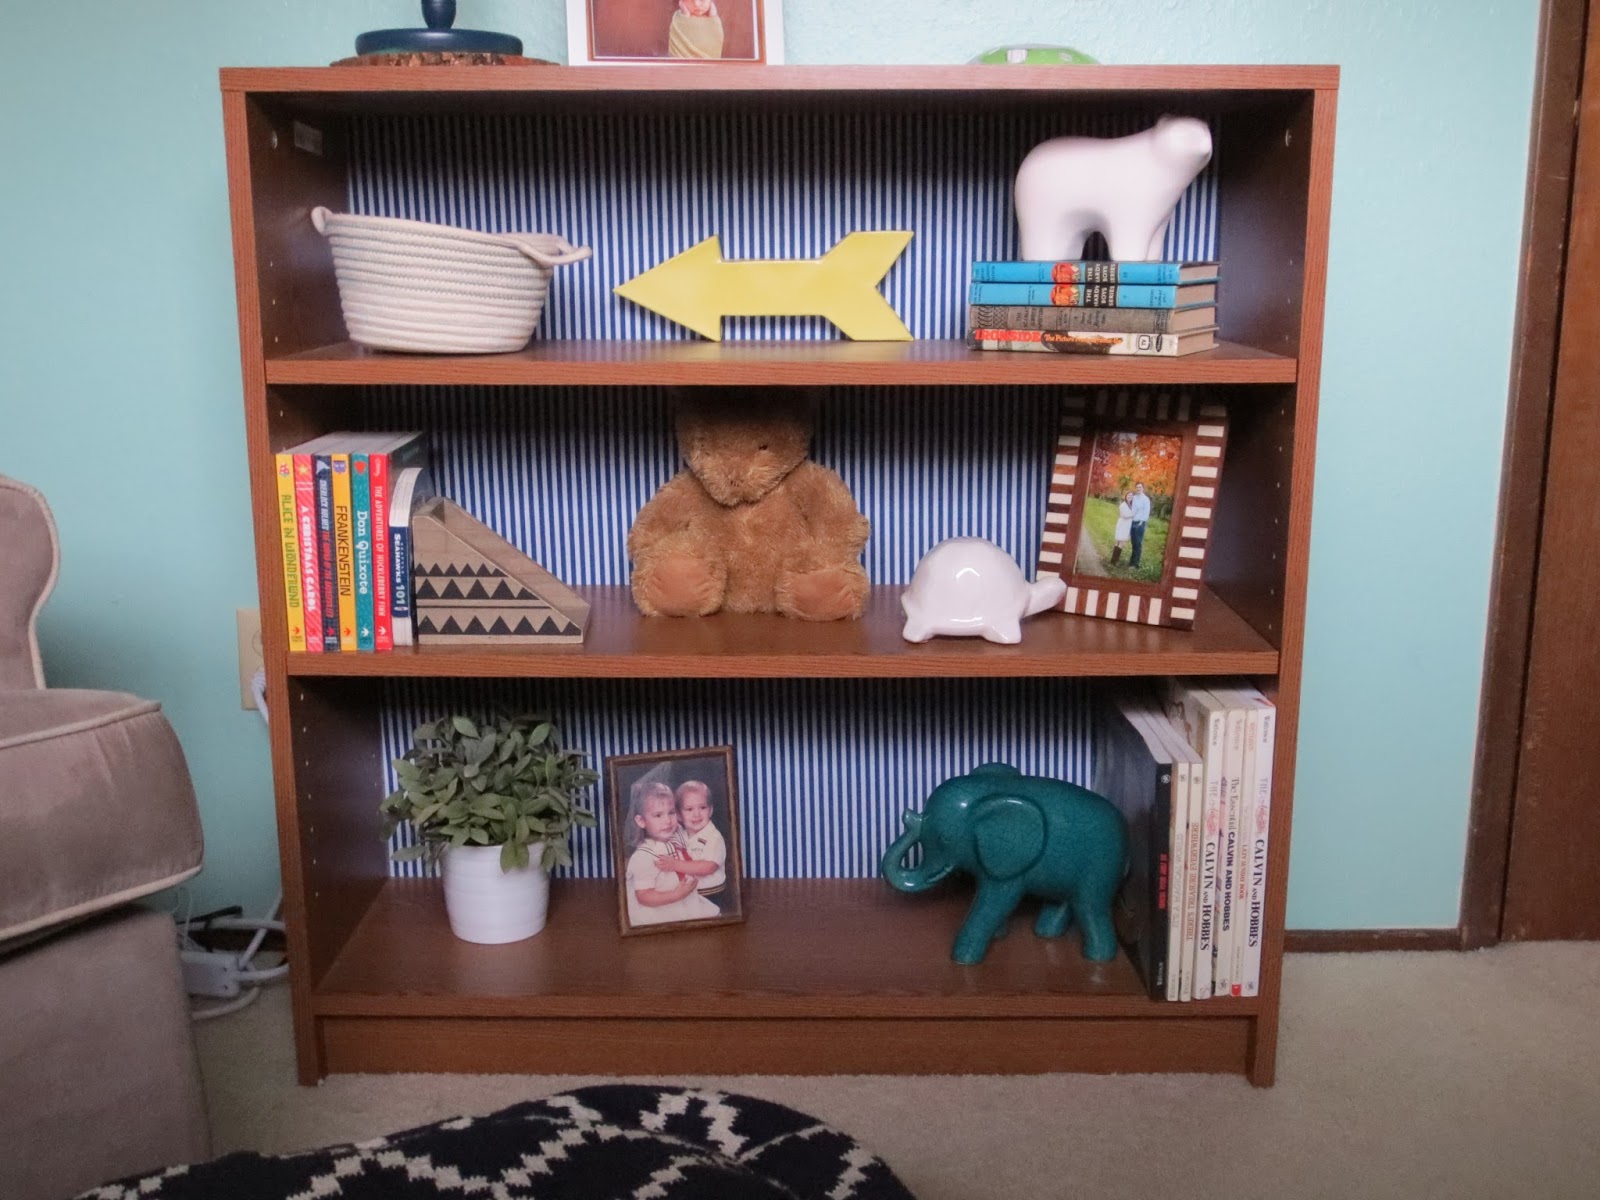

Teal Elephant is from Target. Had to display Zach's collection of Calvin and Hobbs! Mountain book end is from Hobby Lobby. White ceramic bear is from Target (sitting on some original Hardy Boys books from my Grandma and Grandpa). And rounding out the shelf is an awesome pic of Zach and his older sister Bethany. I'm pretty sure we need to find those outfits and recreate this photo with Em and Teddy!


Instead of finding a second hand dresser and refinishing it, I went with an IKEA dresser in Navy. I love the color and it was less work than having to sand, strip, prime, paint, and seal a second hand version. Well, it might have taken just as long to put the IKEA version together... youknowwhatimean. I switched out the knobs with cute aqua and white stripe knobs from Lowe's. Lamp, hamper, pouf, rug and changing pad cover all from the mother ship... Target!


I made the map art from two spindles I stained, some twine and a $5 map print from Ben Franklin Crafts. The "T" and the "K" are from our parents - they found them in the gift shop at the hospital when Tedster was born and brought them to our recovery room. The mobile is an old antique mobile my mom found at an antique store. it has little clips on the ends of each hangar, perfect for hanging photos!


Home is wherever I'm with you canvas I made a few years back - tutorial here.


That's it! Teddy's Teddy Bear Nursery. Now Max is in there, and it is pretty much the same! :)

Sunday, March 22, 2015

Gummy Bear Nursery Ideas


Hey guys! I'm back with a little nursery update. All of a sudden I've got the nesting bug, big time! With about 10 weeks to go (say what?!?!!) until the Gummy Bear gets here, I've got it bad. All I want to do is get the nursery ready for him to be here! But, first comes busy season (which ends in a few weeks, thank goodness) and then comes rearranging most of our house to make room for the new kiddo. The guest room will be moving to our converted garage/storage room, Em's big girl room is moving to the former guest room and the Gummy Bear's nursery will be in Em's current nursery. Lots of rearranging...

Since Gummy Bear will be moving into Emerson's old nursery, we are keeping the wall color the same (Martha Stewart Sea Glass, which is now discontinued...). I love that color so much and think it will go well with some navy, gray and wood accents instead of coral and yellow. 

Running with our Gummy Bear nickname, I want to do a Bear/Be Brave/Adventurer type theme for Gummy Bear's nursery. I don't think it will be super theme-y, but I'll start there and see how it goes! 

Here's some of the details of the little mood board I put together.

1. Navy and White Striped Curtains - I'm planning on making some of my own with some IKEA curtains I found last week. Hopefully much cheaper and not too hard to do!

2. Swivel Glider -  For Emerson's nursery we got my Mom's old wooden rocker from when she first had me (and we still have it). But, it wasn't super comfy, so I splurged for an upholstered glider. We actually put it together today and it's pretty comfortable!

3. Paint Color - Martha Stewart Sea Glass (now discontinued, unfortunately!)

4. Be Brave Wood Plank Art - I love this and maybe will attempt to make something myself? Or have Zach make it for me... :) 

5. Bears Art Print - Love this one so much!

6. Bear Cub Little Darling Print - I've always been a fan of the The Animal Print Shop and can't wait to incorporate this one into the nursery!

7. Herringbone Rug - I found this beauty from Target. Since the room so small, we got the 4x5 size and it is so soft and plush.

8. Let's Sleep Under The Stars Print - I think we all know how much I love Katie Daisy, so would love to have another one of her prints in the new nursery.

9. Bear Head - I love this Bear head taxidermy style wall decor. I'm also crushing on this one too.

10. Navy Patterned Pouf - I actually have had a similar navy pouf for a while now and think it will look great in the nursery.

11. Jenny Lind DaVinci Crib - This is Emerson's crib and hopefully if we time it right, we can transition Em to her big girl bed and use her old crib for the Gummy Bear! Fingers crossed!

12. Threshold Ikat Table Lamp - I picked up this beauty at Tar-Jay. 

13. IKEA Hemnes Navy Dresser - We picked up this guy recently. I would have loved to re-do another dresser like I did with Emerson's room, but I'm not up for the task this time around! Definitely taking the easy way out! But I'm glad that I found this one that came in blue. It will still add a little character to the room. 

That's it! Who knows when we will actually have time to get all this done (we'll have about six weeks post-busy season and pre-baby). All I know is I can't wait to put it all together! And mostly, I'm so excited for this little Gummy Bear to come join us!!! :)

Tuesday, September 24, 2013

Scrapbook Paper Letters for the Nursery


I'm back with yet another nursery project! I couldn't share this one with the rest of the nursery reveal since we didn't reveal Emerson's name until she was born. But, I definitely had this project done ahead of time! I'm pretty sure I accidentally left the letters out when my mom stopped by one day so she found out the name ahead of time... oh well. :) 

Supplies:
Paper mache letters from Hobby Lobby (around $2.50 each)
Acrylic craft paint (for the sides) and brush
Mod Podge
Foam brush
Scrapbook paper in coordinating colors


First, I painted the sides of each letter an off white.

Next, I placed the scrapbook paper face down on the table and turned each letter backwards and upside down and traced out the letters. Then, cut out each letter.

Then, I applied (in small sections) mod podge on the paper mache letters and then placed the paper on top. Once the bottom layer was on, I applied a thin and even layer of mod podge over the top of the scrapbook paper to seal it and protect the paper. The mod podge dries clear and gives it a glossy coat.

Such a fun and colorful way to personalize a room. Especially for people that love typography as art like me!

Wednesday, August 21, 2013

The Nursery Reveal!

The day is finally here! I know you've all been waiting and I'm so excited to share with you the big nursery reveal! I had so much fun putting the room together (check out my original inspiration) - so many DIY projects and colorful accents. I LOVE it so much! The only thing it's missing is our Little BK (hopefully she'll be here in TWO days! EEEEEK!)!!!

This is seriously my favorite room in the house (and the only one that's finished). It's not a big room, but the layout came together really well and everything just fits. I love our little reading nook and can't wait to read Little BK a ton of fun books! My Mom and I made the yellow Pom Pom Curtains.

One of my favorite projects was the DIY Pouf Ottoman. It's heavy as an elephant, but so comfy on top and will be perfect for my tired feet when I'm rocking BK to sleep.

The rocking chair is a special piece - my Dad bought it for my Mom when she was prego with me! It's rock solid and is actually really comfortable. So special to have a family heirloom piece in the room! My Mom sewed the cover for the rocking chair cushion - cushion and fabric both from IKEA.

So many great books - can't go wrong with Dr. Seuss and Calvin and Hobbes (the hubby's favorite). She's also fully stocked with headbands... no one will ever doubt that she's a girl! Ha!

Another special piece - the ballerina figurine was given to me by my Daddio. I used to be in dance up until 5th grade and after each recital he would get me a ballet figurine. I have a whole collection, but didn't have enough room to display them all in the nursery. The wagon calendar was given to me by my Grandma at my baby shower and I DIY'd my anthropologie inspired book covers.

Who doesn't love a good collage frame wall? I can't get enough. I love all the white frames. I have two prints from my favorite artist - Katie Daisy (You Are Loved and You Are My Sunshine). I had to include my DIY onesie from our Pregnancy Announcement Photo Shoot. I did some DIY for the frames as well - the Small but Fierce Glitter Art, Hot Air Balloon Art, and then I made the Vintage Playing Cards art from some fun circus playing cards I found at an antique shop in Arizona on our Babymoon.

One of my favorite pieces is the yellow metal bike! It used to be my Mom's and was a dark brown color. Since she knows I love bikes (even though I don't even have one right now - what's up with that?!) she spray painted it bright yellow for me and it looks so amazing up on the wall!

I also love the Dream a Little Bigger, Darling print and the Puppy Silhouettes I whipped up (using a technique similar to what I did here but with scrapbook paper instead of paint).

Are you still with me? :) Here's the other side of the room - not as exciting, but closet (I still get a kick out of all the miniature baby clothes - so cute!) and hamper. I made the garland out of felt I had leftover from the Hot Air Balloon Mobile (one of my other favorite projects!) and some white ribbon.

Before I forget - the paint color is Sea Glass by Martha Stewart and we got the yellow chevron rug from Urban Outfitters.

I do have one more DIY project I need to share, but not until after she's born since it spells out her name. We picked out a name, but aren't sharing with anyone yet (not even our families!). I'll be sure to share when she gets here! :) The crochet blanket on the crib was my baby blanket made by my Grandma.

The Hot Air Balloon Mobile is seriously my favorite (it's the husband's favorite too). My Mom also helped me sew the Ruffled Crib Skirt... but never again!

I busted out this love pillow using the same technique I used for this pillow.

Still in love with my coral dresser, complete with fun drawer liners!

One of my thriftiest finds was the lamp I found at Target in the clearance section. Love it so much - almost as much as the 20 week ultrasound picture of my sweet baby girl! I also got the table runner at Target on clearance which matched perfectly with the dresser and will be great to keep the top from getting scratched up.


That's it! I hope you like it as much as we love it! :) Now we just need Little BK! Come on sweet girl!

Wednesday, August 14, 2013

DIY: Ruffled Crib Skirt


Well, this is the second time I am writing this post... stupid computer! Another DIY nursery project for you today. When my mom was over a couple weeks ago, she helped me with this ruffled crib skirt. We used this tutorial and it was pretty helpful.  At first I wasn't sure if I wanted to do a straight crib skirt or a ruffled one (I'm not a ruffles person), but decided to go for the ruffles to make the room a little more feminine and add some texture. 

This project only cost $10 too - it was the IKEA Vivan curtains to the rescue again! It's such a cheap way to get some plain white fabric. The fabric is thin, but worked for the crib skirts since we were doing the ruffles anyways.

We started out with our cuts:
Base - 1 piece 28" x 52" (size of the crib mattress)
Side Panels - 1 piece 52" long, 2 pieces 28" long (and long enough to have the ruffled pieces hemmed on)
Ruffled Strips - 9 pieces that are 2.5 times the width of the sides and six inches high. Three strips for the long side that measured 130" and six strips for the short sides (three each) that measured 70" long.

After making all the cuts and hemming the edges, it was time to ruffle. This was the hard part... and we realized too late that my sewing machine had an actual "ruffling" attachment. Bummer. Instead, my mom used the technique of making three basting stitches in a row along the top of each strip leaving the end threads really long. 

After separating the top three threads from the bottom three, you can pull on the top three and scrunch the fabric together to create the ruffles (making sure to pull hard, but gently so you don't break the thread). It works like a charm, but takes some time to make the ruffles even. 

Then we pieced the ruffles onto the side panels starting with the bottom ruffle and making sure all ruffles lined up. We kind of just made it work... nothing too scientific here.


It was a labor of love, but we got it done! I like how the white ruffles are not too loud but bring some texture and girliness to the room. So glad it's done! And if I never see a ruffle again, I'll be very very happy. 


I'm pretty much done with the nursery and I'm hoping to share pics with you guys by the end of this week or early next week! 

PS - we are in SINGLE DIGITS! Only 9 more days until she is here (hopefully!)

Tuesday, August 13, 2013

Two Nursery IKEA Hacks - Pom Pom Curtains and Rocking Chair Cushion


My mom came over last weekend to help me out with my last nursery sewing projects. We ended up sewing almost all day long! It was a lot of work, but I am so in love with the end results!

Turns out all our projects were IKEA hacks... the first was a plain seat cushion that my mom made an awesome cover for. I don't have any step by step since my mom is amazing and just did her thing. :) It turned out so great though. The fabric is also from IKEA - they actually have some really cute (and really cheap) home decor fabric.


The next project was super easy. We basically just added a row of yellow pom poms to the edging of some Vivan IKEA curtains ($10). So simple, yet I think it adds such a subtle and playful effect to the room.


I love how both turned out and I am so grateful for my mom's help! She is a master seamstress! Next up is the dreaded ruffle crib skirt we made... (also from an IKEA Vivan curtain!).

LinkWithin

Related Posts Plugin for WordPress, Blogger...